Tuesday, March 31, 2015

Gold Foil Technique


Hi everyone!
I have a very simple card to share using a foiled sentiment we created while at our Stamping Away Retreat weekend.  

We wanted to bring this ever popular technique to the retreat girls after viewing Jennifer McGuire's video.  Her video gives step by step instructions for creating a foiled image or sentiment using a laminator and laser printer.  I won't re-create the wheel here.......just go watch Jennifer's video HERE!!!!

I simply cut down my sentiment, added foam adhesive, and mounted it onto gold striped pattern paper.  Easy Peasy!

Foiling

Thanks for sharing a part of your day with me!

Saturday, March 28, 2015

AEI♥U Challenge news!!!!


Good Morning Saturday!
I finally get to share some FUN news with you here.......

Grab Our Badge

I'm so excited to be joining my friends over at Avery Elle as part of their 

AEI♥U montly challenges!  Don't miss it as the next challenge goes up on April 1st!


While I don't have a new card to share, I though it would be fun to share some of my oldies but goodies I've made using Avery Elle!


9.30.13

AveryElleCurtainCall


so sweet3


Thanks for sharing a part of your day with me!

Friday, March 27, 2015

Peek-a-boo Layout


Happy Friday everyone!  
I mentioned a few weeks ago that I've secretly been **loving** my Copics for coloring.  Now.....I only hope that I can one day make it look as good as some of my coloring idols!!  

In case you missed THIS POST over on the Taylored Expressions blog last week, I shared a card using some adorable little animals, from Somebunny Loves You, that I colored and used a "Peek-a-boo" layout of sorts which was inspired by Laura Bassen's fine work.  :)  While I AM going to share the card here, I won't share all the details as I hope you would check out the Taylored Expressions blog post instead where you can find all the details and "how-to" for my card!

The faces, bunny ears, and that sentiment literally just crack me up!  

Full card

Thanks for sharing a part of your day with me!

Thursday, March 26, 2015

SFYTT with Reverse Confetti


Hello!  I have a fun card to share using more of the Quick Card Panels (QCP) from Reverse Confetti.  I seriously love these!  This one also uses the current SFYTT from Reverse Confetti.......there is still time to play along!

SFYTT2

I wanted to create a little bit different Easter type card.  So pulling colors from one of the Spring Fling QCP's from the March release, I created my focal point by layering my QCP onto a teal layer and diecut using a circle die from Circles 'n Scallops Confetti Cuts.  My bunnies were stamped and diecut using the Carton Cuties and Confetti Cuts.  My sentiment (from Petals 'n Posies) was stamped onto a banner die from Tag Me.

SFYTT


Now the best part is.......there is always a winner every month!  Here are the details:

The winner will receive a $20 gift certificate to the Reverse Confetti store and claim the title of ‘Fetti Fave. The winner of SFYTT will be posted on the Reverse Confetti blog on the 30th of each month.
Check out the SFYTT post......HERE.

So let's see your Reverse Confetti creations this month.....you still have time to get it done!

Thanks for sharing a part of your day with me!

Friday, March 20, 2015

Sketches for a starting point.......


Hi everyone!  I have been a little quiet here but that is because I have finally started moving my crafty stuff to another "temporary" space in our house.  My teenage son (sniff sniff) wants my basement room.  So we are beginning the whole room switcheroo.  Not sure where I'm going to put everything in the interim but I can't wait to get a new craft room out of this deal!  

When I started yesterday to make this card, I was a bit stuck.  Ever feel that way?  So I found this great sketch over at Retro Sketches.  A sketch is a GREAT way to get the mojo going when your stuck!  Well, I made this card (with my daughter helping choose colors) and I totally forgot to get it up here on the blog but I wanted to go ahead and post it now to be able to link up before the linky closed.  

I started with a strip of pattern paper from Home+Made by Jen Hadfield.  This pad is gorgeous!  My blooms were diecut with the Petals 'n Posies stamps and coordinating Confetti Cuts.  

Thanks a bunch

My sentiment was white heat embossed onto a black cardstock strip and tucked behind the blooms which were layered onto a stamped Give Thanks frame diecut.  Then I added lots of Sparkling Clear sequins from Pretty Pink Posh. (love love love these)

Thanks a bunch2


Thanks for sharing a part of your day with me!

LOTS of DUAL stitching........is good! :)


Welcome everyone!  I am so excited to finally share some amazing new dies to the lineup over at Lil' Inker Designs!  Laura is known for her "DUAL" stitching dies.....the concept is amazing!!  Well.......hold onto your hats......Lil' Inker Designs now has DUAL Stitched Rectangles and DUAL Stitched Squares!  I know some of your were patiently waiting for these so hurry over because they are AVAILABLE NOW!!!  

Here is a bit about the new dies:

The Stitched Mats: Dual Stitched Rectangles gives you THREE THINGS that you've been asking for for quite some time:
  • An A2 card base sized stitched rectangle die
  • Additional sizes of the Stitched Rectangles you love so much :)
  • AND a set of Dual Stitched Rectangles


I've used the Stitched Mats: Dual Stitched Rectangles.  To create my stitched borders, I used BOTH the largest and second to largest TOGETHER at once in my Big Shot.  This way, I get my cutting done in one pass and it cuts a perfect frame!  I could seriously add stitched to everything!


Feathers

I brought out an older set called Fancy Feathers and coordinating dies.  I stamped, diecut, and colored my feathers.  My sentiment was PERFECTLY stamped using my MISTI tool.  OMG.....this tool is the best thing since sliced bread!!!!  I bought mine over at My Sweet Petunia.......and VERY fast shipping!

Feathers2

How could I pass up using more of my favorite Sparkling Clear sequins from Pretty Pink Posh?  They are just insanely perfect.  :)


For a little fun, I made my card using the sketch from CAS(E) this Sketch which is ran by my sweet friend Chrissy!  Waving hi to you!  


Thanks for sharing a part of your day with me!

Thursday, March 12, 2015

Embellishing Quick Card Panels


Hello and welcome!  
Today I wanted to share a card that was made by embellishing the new Quick Card Panels from Reverse Confetti.  

Hello Sunshine

These card panels are perfect to use for a QUICK handmade card.  What's even better is that adding a few embellishments to the card panels adds so much texture and interest.  Here, I've added some diecuts from Sun 'n Clouds Confetti Cuts and a border using the Wonky Double Edge Scallop Border Confetti Cuts.

Hello Sunshine2


Thanks so much for sharing a part of your day with me!

Tuesday, March 10, 2015

Lil' Inker Designs March Monthly Meetup Challenge!


It's March 11 and we are ready for another Monthly Meetup Challenge over on the Lil' Inker Designs blog


I couldn't help but use the new Really Rosemaling stamp set that was just released last week.  It's one my new favorite sets!

Amy Rosemaling3

Here's what you need to do to play along:
  • Make a new project or share something you've been working on featuring LID goodies!
  • Post this project to your blog or favorite gallery.
  • Link your project to our challenge by using the InLinkz tool at the bottom of the post on the LID blog.
  • You have through March 18th at 11:30 PM EST to link your project to be eligible to win a prize. Projects should exclusively feature LID goodies to be eligible to win but do not need to exclusively feature LID goodies to join our Meetup.
  • This month's prize is a $50 gift certificate to Lil' Inker Designs!
  • Winners will be announced in a new blog post shortly after March 18th. Have fun and we can't wait to see what you're working on!

Monday, March 9, 2015

Just for fun with Bear Hugs and some amazing women!


Hi everyone!  I just returned from a WONDERFUL weekend of crafty time with 15 of the most amazing women that I can call friends at a house that inspires you the minute you walk through the door.  The ladies that traveled from near and far can attest.....the house is just AMAZING!!  Maybe it's the house or just the time being together......either way, I loved it!

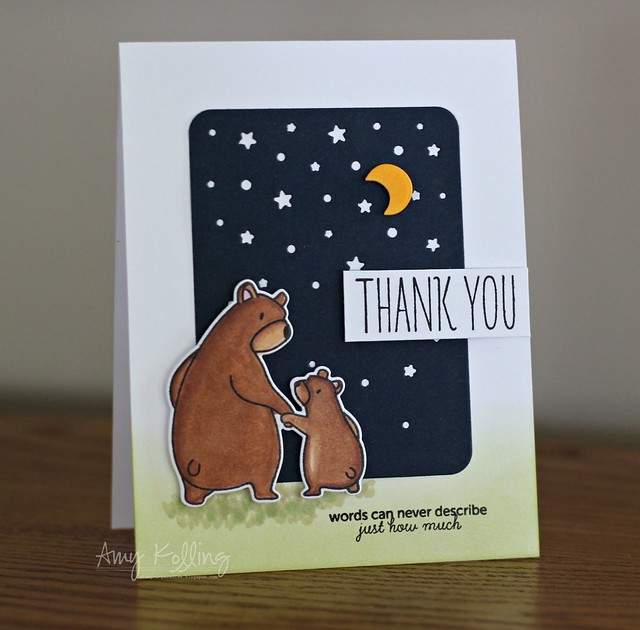
I shared a sneak of this card over on my Instagram page this morning.  I have been enjoying my Copics so much the past few months (Jen Carter......I am officially saying I love them!  You have given me so much feedback and I treasure it!)  

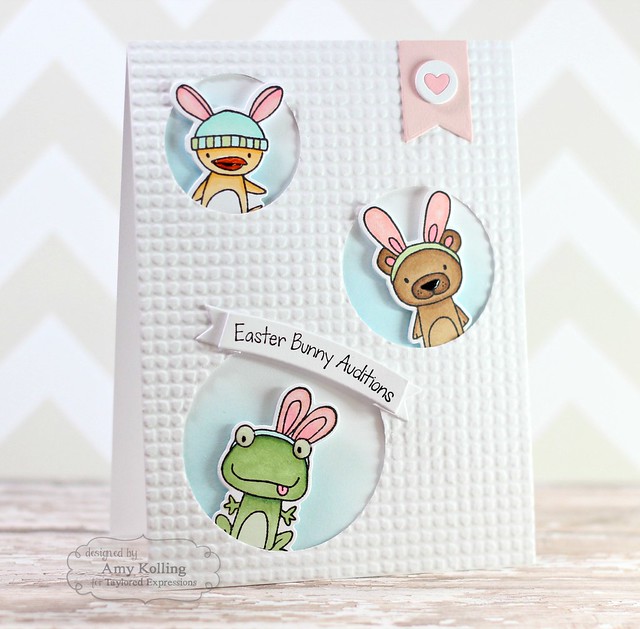
I had time this past weekend to really sit back and CREATE for ME for FUN.  It was really relaxing and brought me back to why I started cardmaking so many years ago.  I made it a point to use stamp sets I don't own but have been on my Wish List......there are many and this one from Mama Elephant is one of them!  BEAR HUGS.  

Bear Hugs

I'm not going to give a supply list as that would take the fun out of this post.  But this card is for all my crafty friends who made the trip this past weekend and made me feel so loved.  Thank you ladies!

Bear Hugs2

Now to share a group photo of the 16 of the amazing ladies.......truly inspiring each and every one of them!!!  Love you all so much!  <3 p="">

Group cropped

As always, thank you for sharing a part of your day with me!

Related Posts with Thumbnails